I could be on Netflix enjoying a late night movie now but no, some guy who runs a publication company in Netherlands decides to invade my privacy and forcefully demand that I reveal my painting techniques. Well, to be honest, there’s no special or secret technique I use. Anyone reading this is going to be disappointed. So to satisfy the needs of my long distance stalker, I’ve decided to do a write up of my “techniques” or the lack of it.
First off, my theme is and will always be the Japanese style. Of course some of the historical or mythical subjects that I paint can be traced back to ancient China. Some even have Hindu roots. But I try to lean toward the Japanese interpretation. It’s very challenging as a non-Japanese to attempt painting in this style but I love the challenge. I’m highly influenced by masters like Kuniyoshi, Kunisada, Kano Hogai, Hokusai, Kyosai and Kuniteru who is my current favorite. He did a handful of prints with very dark background and they are just so perfect for tattoo designs.
I’ve tattooed for 16 years and painted for about 3 or 4 years, so my painting is somehow influenced by my tattooing. Weirdly, the more I paint, the less I want to tattoo. Being a novice painter, I’m still very much in my learning stages so please forgive my ignorance. Blame André for having bad taste and asking me to write this.
So lets begin, I want to get back to my Netflix as soon as I can.
There are the media I use:
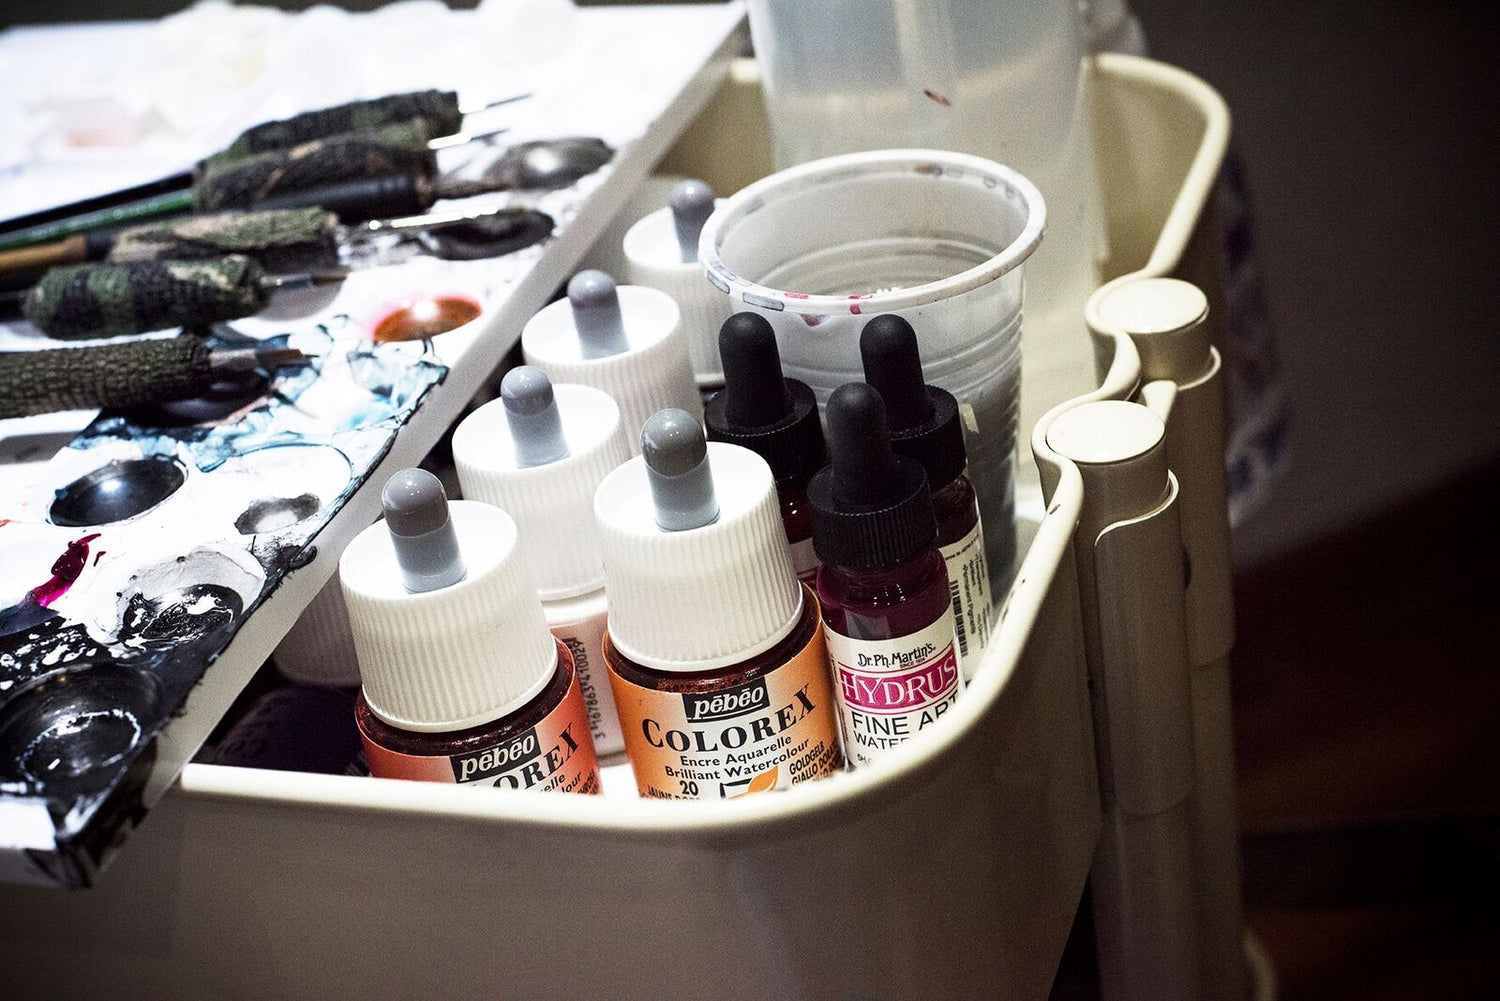
- Liquid Watercolour (Dr ph martins Hydrus and Pebeo Colorex)
- Copic markers
- Talens Indian Ink
- Powdered pigments with a water colour binding medium
- Liquid Acrylic (for outlines when I work with Copic)
- Daler Rowney mixed media paper 250g (for copic)
- Saunders HP 300g, 100% cotton, water colour paper

[ I like to wrap my brushes up with bandage. I’m too used to tattooing with 30mm grips, so I’m constantly trying to get the same feeling of holding a grip even when I’m painting. I like it nice and thick. That sounded weird but you know what I’m trying to say. ]

I bought a set of powdered pigments in Kyoto and I’ve been trying to mix up some diluted earth tones. There’s a lot you can do with the density when you mix your own pigments.

My wife got me this easel for one of my birthdays and we eventually got a white tabletop from Ikea and drilled it onto the easel. There wasn’t a ready-made drawing table that I liked so we decided to be DIY about it and fix up our own.
And now, half of you are probably falling asleep and the other half have decided to read on hoping to discover something valuable enough to tell your kids about. I will continue writing because I’m very determined to finish this tonight and continue with my movie watching.
My painting process has a few steps. I usually sketch out the idea with a red pencil, or a light colored marker on any paper that’s lying around. Usually the papers that are within reach without me standing up, gets used first. 9 out of 10 times, I start my drawings on printer paper, even if I’ve just bought an expensive drawing pad, its still the f”cking printer paper that I end up using. I hate drawing on it because it’s too smooth and it screeches against the pencil sometimes. Yeah my paper screeches. What does yours do?
My ideas come from books, images I’ve collected on my travels and of course the deadly Internet. These days, a lot of my research comes from the Internet, I’m a bit ashamed. But I’ve got a library of books that I’ve collected over the years and I always refer back to them. Even with the convenience of Google, these books are an essential part of my design brainstorming.

Now back to sketching. Once I figured out what I want to paint, the first skeleton sketch gets done in about an hour or two, very rough and messy. And then I follow up with a second layer with a darker marker or a 4b pencil and refine the details a little bit. This is usually drawn on an A4 or A3 copier paper. The screechy ones. And then the third layer is finalized on a tracing paper, and I throw in some fabric patterns and finer details. So that’s 3 layers of the same image. By now I’ve come up with the final lines for everything except the background. Sometimes I use another sheet of tracing paper and work on the background. Once I’m done, I blow it up with a printer to the size I want, use a light box and trace the design on to the watercolour or mixed media paper. I work a lot with a copier/printer to size up or down my images between the different layers of sketches.

[ Sketching process step one and two ]
If I’m using copic markers, I’ll trace the lines from my sketch onto the mixed media paper using a grey pen first, fill in all the colours and then do the same lines over again towards the end so it overlaps everything else.
For water colour, I just line it once in dark grey or black in the beginning and I paint around and over it. Usually the colours don’t cloud the lines because I line with talens indian ink and it doesn’t wash off with water colour but I’ve experienced a bit of bleeding when I use copic over indian ink, even if I let the indian ink dry out for a few days.
I don’t sketch directly onto the watercolour paper because I have shitty skills at sketching and I’m constantly making mistakes so I don’t want to stain the actual paper too much with eraser marks and pencil indentation. I like working with layers because I can improve and refine my design with each layer. Besides, I don’t usually have many deadlines for painting, so I take my time with everything. I know a lot of artists who can spontaneously sketch stuff without preparation and paint it right away without making any amendments but I’m not that fortunate. I’m a slow learner and make too many mistakes so I take twice the time in creating designs, slow but careful.
People ask me what happens when u make a mistake? What method of recovery is there? There’s one method and it works every single time. Look closely at your stupid mistake, take a deep breath, curse in whatever language suits u best, quickly tear the damn paper up and start again. I think I’ve thrown away more paintings than I’ve collected. My wife freaks out all the time. She sees a half completed painting, starts appreciating it and the next morning it’s gone because I got careless and made an unwanted splatter of some shit. These days she warns me not to destroy anything.
Why do I switch between Copic and Watercolour? Well, I’m trying to learn new techniques. With watercolour and a thin brush, I can achieve fine line precision but copic usually comes with a thicker brush tip and there is always the problem of bleeding and overflow. I don’t know the exact term for when your ink flows more than desired and spreads out of the intended area, so I’m using the word “overflow”.
I can change the Copic brush tip to a smaller one but it’s never thin enough. I’ve learned to deal with this “overflow phenomena” of copic by emptying or drying it out a little, before I work on detailed areas or thin lines. It’s a waste of ink, I know. But with a half empty Copic, I get a better chance at keeping all the ink where I want it.

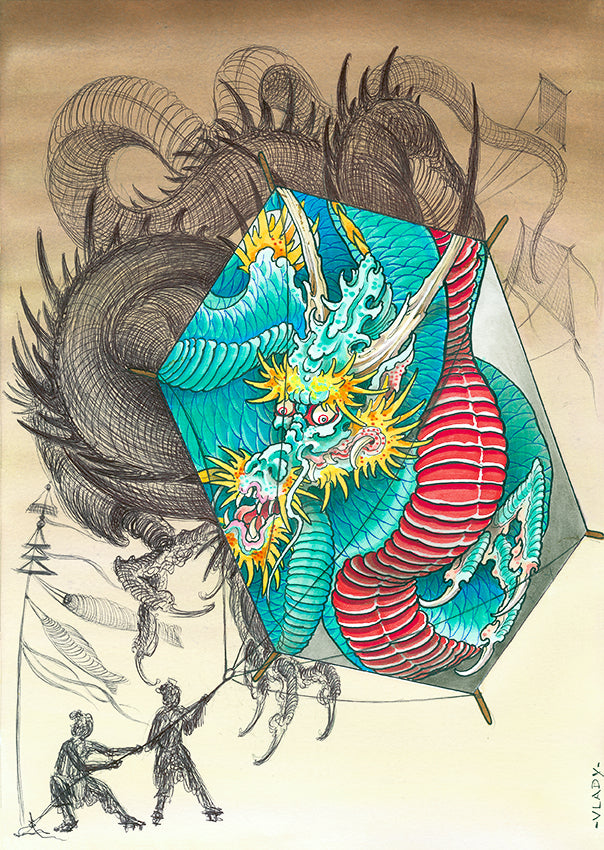
[ This guy here is done with Copic. I did the lines of the waves with a copic pen, size 0.8 I think and the main subject is lined with liquid acrylics. ]
Half of what I paint is from memory or imagination and the other half is based on a lot of reference. I never really copy directly but I do follow certain Ukiyo-e masterpieces closely. I have the utmost respect for the old masters and I try to learn from studying and understanding their style. I recreate Ukiyo-e masterpieces and try to add a touch of my own. I believe that before creating something original, I need to attain enough knowledge and experience through practice. It’s just like playing music. Most bands start out by covering songs before making an original track. This applies to many other art forms as well. Everybody works differently, so it’s very important for me to discover what my capabilities are and how hard I need to push myself.

Still reading? Well then, lets carry on.
I’ve been exploring watercolour a bit more recently. Copic is very consistent and it gives intensity and impact to my designs because of the vibrant colours but there are times when I want to achieve a slightly more vintage look and with watercolours, the liquid ink form, I can really get that effect by diluting it with water or any dull tones. ( Eg. Sepia and turtle dove grey ) The overall product becomes a lot more softer than Copic. The slightest change in ink density can create a totally different effect. Copic conveniently comes in many different ready to use shades but with watercolour, I can mix up my own blend. Its time consuming and I complain about it all the time but I love creating my own cocktail of colours. In fact, over the last coupe of months, I’ve collected a few bottles of watered down earth tones that are ready to use.
I guess my goal has always been to understand my media better. For some reason, there’s always a new way of doing things. Each painting teaches me something and each mistake reveals a new path. I will never stop learning because when one thinks he knows all, he knows nothing. The eagerness to learn gives me strength and motivation. For me, this is just the beginning of my journey and I’m grateful for this opportunity to share a glimpse of it with you.
I hope you’ve enjoyed reading this because it has cost me a lot of my Netflix time
 .
.
[ I started with a diluted Talens Indian Ink for the lines and liquid watercolours for everything else ]
 .
.

Leave a comment
This site is protected by hCaptcha and the hCaptcha Privacy Policy and Terms of Service apply.